What a finished WebP compression pass looks like
A finished pass leaves three things in place.
The originals stay untouched in a folder you can return to. The WebP set replaces them on the page: every image converted, each file inside the budget you set for its role. The record holds what changed — before-and-after file sizes, and the images you compared by eye at the size readers actually see.
Nothing else moves. Layout stays. Color stays. EXIF data stays or goes by your decision, not by accident.
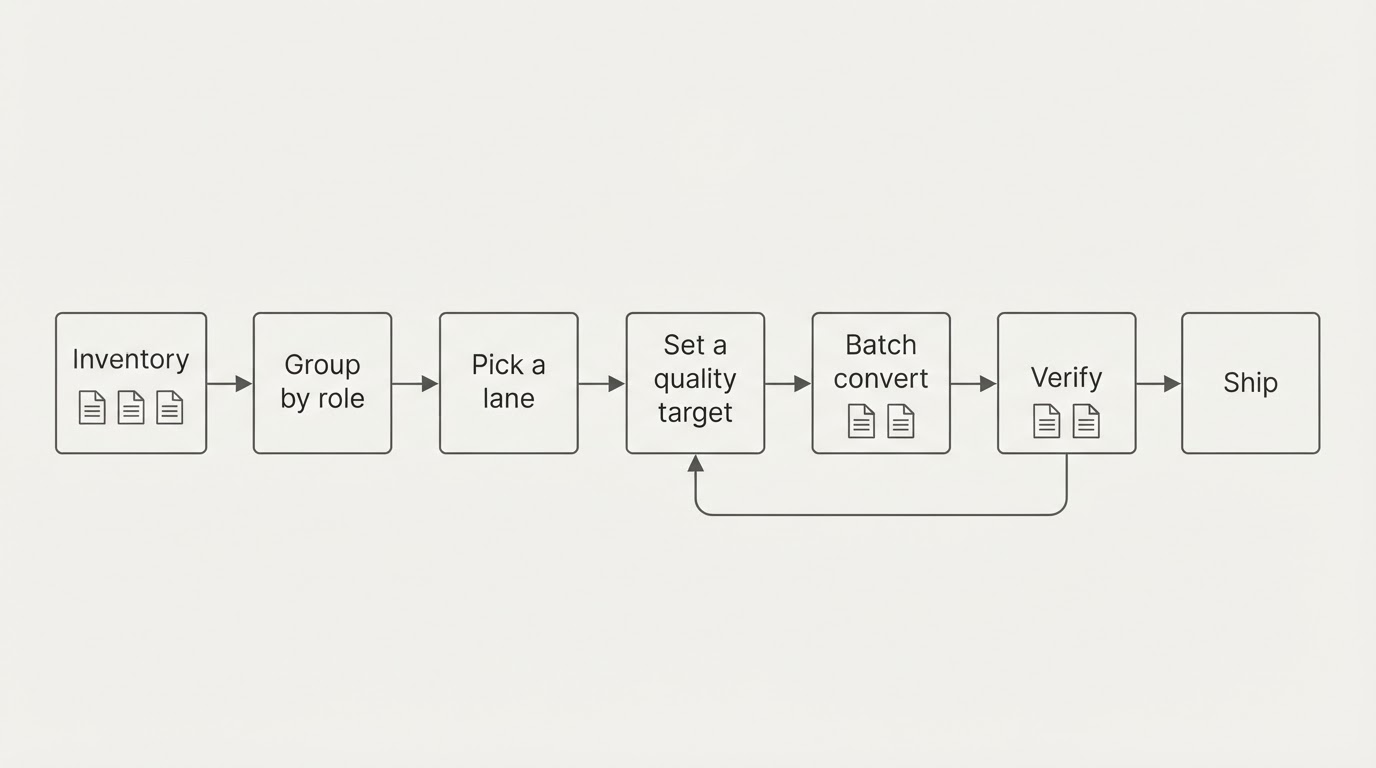
The eight steps below take one image set through that pass. Run them once, and the pass becomes the template for every set that follows.
Step 1: Inventory the images you ship
List before you convert. Open the page, app screen, or asset folder and write down every image, its current format, and what it does on the page.
Group the list by role, because each role earns a different size budget:
- Hero and full-width images
- Content and product images
- Thumbnails and avatars
- Icons, logos, and flat-color graphics
For each file, note two properties: whether it needs transparency, and whether it carries EXIF or GPS metadata. Those two properties decide the rest of the pass.
Done when every image has a recorded role, format, and transparency or metadata note.
Step 2: Choose lossy or lossless for each class
Split the list into two lanes before you touch a quality setting.
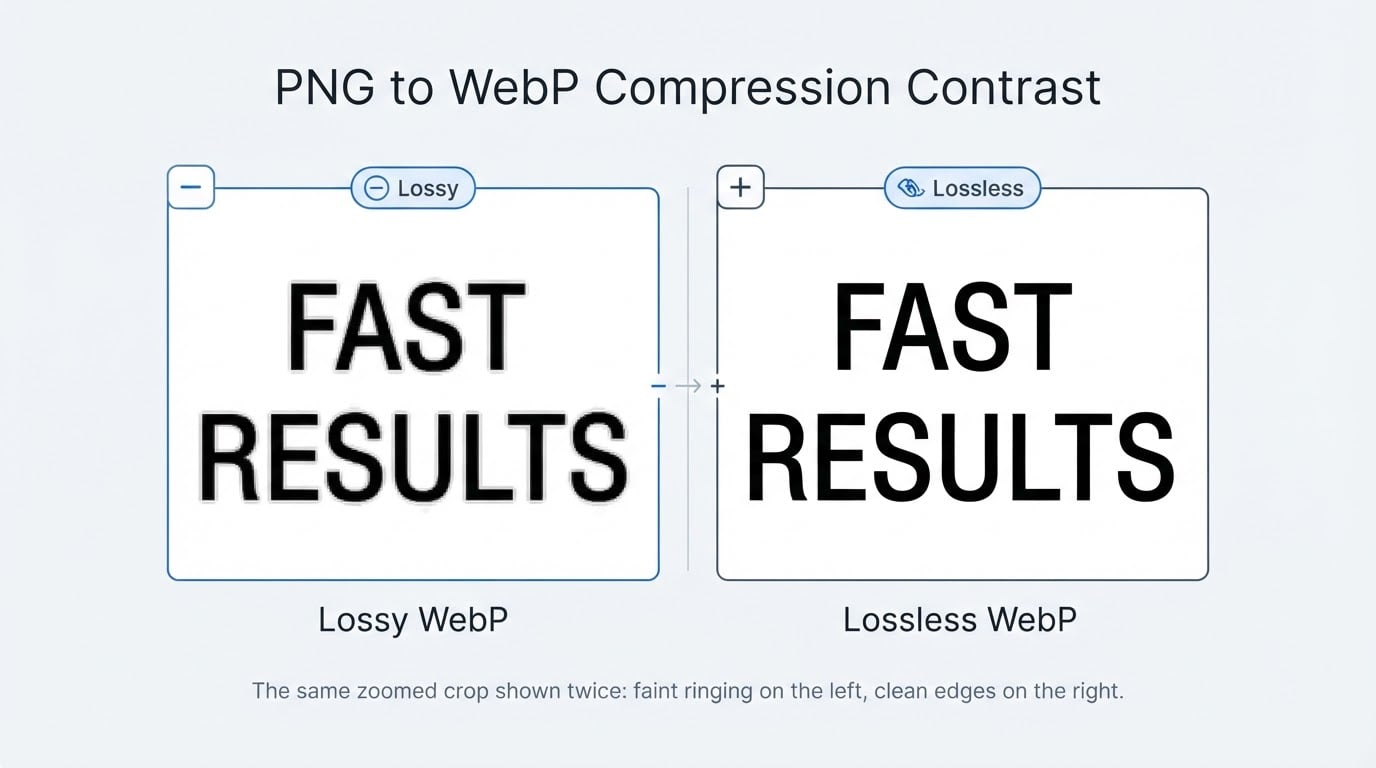
Lossy WebP suits photographs and other continuous-tone images. It discards detail the eye is unlikely to miss at normal viewing size, and that is where most of the size reduction comes from.
Lossless WebP suits screenshots, text-heavy images, line art, and flat-color graphics, where soft edges and color shift are easy to spot. Lossless keeps every pixel, so files stay larger.
Mark each image lossy or lossless on your list. When a class sits between the two — a screenshot-heavy page with one photographic hero, say — send the hero to lossy and the rest to lossless.
Done when every image has a lane assigned and no image is undecided.
Step 3: Pick three test images and one quality target
Choose a single quality value for the lossy batch and hold it. Per-image tuning multiplies decisions without improving the result enough to justify the time.
Pick three images that stress different content:
- One photograph with smooth gradients, like a sky
- One image with fine text or sharp edges
- One flat-color graphic or logo
Set the quality value in the middle of your converter's scale as a starting point. Lossless images have no quality value to set — they stay lossless.
Done when the three test images are chosen and one quality target is written down.
Step 4: Convert the test batch and measure it
Run one small conversion before the full set. Convert only the three test images.
Then check two things. First, sizes: record the before-and-after for each file. Second, visible quality: view each result at the size it appears on the page, not at 100% zoom on a detail nobody will see. Compare the sky for banding, the fine text for mush, and the flat colors for shift.
If the result holds up at display size, keep the value. If banding or soft edges appear, raise the quality target and convert the three again. Two or three passes settle it.
Done when all three test images have recorded sizes and pass a display-size visual check.
Step 5: Convert the full set
Apply the settled setting to every image on the list. Convert in one batch per lane rather than file by file.
Keep the originals. Name the converted files so the mapping is obvious, and never re-encode a file that is already WebP. Converting an already-compressed image compounds the loss for no gain.
If the pass runs on a Mac, keep the work on the machine. Image2WebP batch-converts to WebP or AVIF from JPEG, PNG, HEIC, BMP, TIFF, HEIF, PSD, and RAW, and converts WebP or AVIF back to JPG or PNG. Processing runs on-device, so files never leave the machine. Batches of up to 10 files convert free; a one-time $1.99 Pro unlock removes the cap and preserves EXIF and GPS metadata through the conversion. Image2WebP is published by HP60 Studio.
Done when every image has a converted counterpart and the originals are still intact.
Step 6: Verify against a size budget
Set a budget per role before you judge the result. A hero image can spend more bytes than a thumbnail, and a budget makes the whole set measurable.
Check three things:
- Each file against its role budget
- The page total against your page weight target
- Any file that came out larger instead of smaller
Small or already-optimized images occasionally grow as WebP. Leave those files in their original format. A format change that adds bytes buys nothing.
Done when every image meets its budget or carries a written exception.
Step 7: Settle transparency, metadata, and animation
Resolve the special cases before publishing, not after.
Transparency: check alpha edges against the background the image actually sits on. Lossy conversion can leave a faint halo where a cutout meets a light background. If the edge shows, use lossless for that image.
Metadata: decide once whether EXIF and GPS travel with the file. Orientation, camera data, and location are useful for photography and risky for anything a client considers sensitive. Strip what you do not need, and keep what the page depends on.
Animation: treat animated WebP as its own case. It carries a quality and frame-rate trade-off, so judge it apart from the still images.
Done when alpha edges are clean, the metadata decision is applied, and animated assets have their own setting.
Step 8: Test AVIF against WebP on one representative photo
Before you commit the whole library to one format, convert one representative photograph to both.
AVIF can produce smaller files than WebP for photographic content, but encoding takes longer and the format arrived later, so support is less universal. WebP remains the safer default for broad compatibility and for animation.
If AVIF wins on size and the extra encode time is acceptable for that class of image, use it there and keep WebP for the rest. If the difference is marginal, one format is simpler to maintain.
Done when the format choice is documented per image class with the test result behind it.
Common mistakes that waste a pass
These come up repeatedly, and each has a fix.
Re-encoding an already-compressed file. Converting a JPEG to WebP and then to WebP again stacks generations of loss. Convert once, from the original rather than a re-saved copy.
Judging quality at 100% zoom. Banding and softness that appear only at 100% rarely survive to the reader. Check at display size first, then inspect closely only where the image carries detail that matters.
Forgetting the 2x assets. High-density displays pull the larger variant. If the 2x image misses the pass, the page still ships the heavy file.
Converting images that should not change. Tiny icons, favicons, and already-optimized assets rarely benefit. Skip them and keep the pass small.
Uploading client images to a browser compressor. A web tool sends the file to a server. If a contract, a client policy, or your own standard rules that out, keep the pass local.
Skipping the metadata decision. Orientation and location data riding along by accident is harder to explain than a deliberate choice either way.
Checklist recap
- Originals archived and untouched
- Every image has a role, a format, and a size budget
- Lossy and lossless lanes assigned per image class
- Three test images cover gradients, text, and flat color
- One quality target settled and reused
- Full set converted once — no double compression
- Transparent edges checked on the real background
- EXIF and GPS decision applied
- AVIF tested on one representative photo
- Export settings saved for the next image set